Monday, August 18, 2014

Crafts for Crayons and Girls Inc.

We are really excited and proud to be working towards what we hope will become an annual event to benefit Girls Incorporated of Metropolitan Dallas which will help girls and young women to be strong, smart and bold. I wanted to share on a more personal level why this is so important to me and my sister.

Two months ago Verizon came out with an ad called Inspire Her Mind that featured the life of a young girl whose parents slowly socialize her to not be interested in science-it stated a startling fact (at least for me): 66% of 4th grade girls like math and science, but only 18% of college engineering students are female. It ends with the question "Isn't it time we told her she's pretty brilliant too"? 


This struck a nerve with me (and my sister, the other half of Pig and Peacock). Our father, the engineer, ingrained it into our beings to be interested in math and science, to have a strong curiosity for how the world works and to learn about it. We even had to learn how to work on our own cars! I know that math and science isn't everyone's cup 'o tea, but the disparity between those two percentages bothered me, so I started looking into STEM mentoring which led me to Girls Inc. which offers mentoring to girls in math, science and tech.

Then, a month later, Always, came out with a campaign and video called #LikeAGirl asking grown men and women to run and fight "like a girl". Then they asked little girls to do the same, and asked the question "When did doing something 'like a girl' become an insult"?


The response from the little girl at 1:15 is what did me in. When she realizes that like a girl is not a good thing, but an insult. Tears. Seriously. It was at that moment that I knew I had to do more that think about doing something and take action. The more I read about Girls Inc. and their mission to empower young girls to be strong, self-confident, and successful the more I felt the need to do something for this organization.

While my sister and I joke that our family was dysfunctional (whose wasn't?) I really appreciate all that our parents did for us. Our father taught us that we should be the smartest kids in the class, that a 99 meant we were capable of making a 100. I appreciate that our mom taught us that to hit like a girl meant we should win the fight (she's real fiesty!) and that if we applied ourselves that there was nothing that could stop us. I realize now more than ever that we are truly lucky to have been raised by them, even if there was a lot of tough love. To thank my parents, I will share that encouragement with others who need it most.

The Crafts for Crayons event with Etsy Dallas seemed like the perfect place to start. While we do have some very talented guys on our team, most of the team members are women who run their own micro/small businesses. We are also all about helping lift each other up and elevating our community. This seemed like the perfect opportunity for us, as a team, to get involved and help by collecting school, craft and art supplies.

We hope that you will join us on Aug 30th at NorthPark Mall from 1-5pm to help support a great cause and share in the opportunity to make a difference!


Friday, August 15, 2014

The 1st Annual Crafts for Crayons School Supply Drive


We are so excited to announce the 1st annual Crafts for Crayons school supply drive at NorthPark Center on August 30 from 1:00 to 5:00!

Did you know:

  • 1 in 3 children in Dallas cannot afford basic school supplies
  • Across the country teachers spend $500 each year out of their own pockets to buy school supplies for their students
  • Back-to-school time is very stressful for many families who cannot afford school supplies
  • You can help
Donate school and art supplies (or cash) and do some cool crafts with us and others from the Etsy Dallas team. All donations go to Girls Incorporated of Metropolitan Dallas. You can make the difference in a child's school year.

We'll be between Nordstrom and Macy's in the NorthCourt. See you there!


Saturday, August 9, 2014

How-To Prepare for a Craft Show (like a pro) Part 2.1

Now that we've covered product, layout, displays, and signage, it's time to get down to business. Literally. After you have made items to sell and put price tags on them you need to start preparing yourself to sell your handmade goods. It is really important to be well prepared for transacting business-if you are not well organized, customers might get frustrated, you may end up with a few people waiting to pay, and you will undoubtedly become frazzled, which is no fun.

From the guest post we wrote on the Etsy Dallas blog:
Prep for Doing Business
One or two weeks before the show, gather everything you need to do business and ring up transactions. Pens, calculators, invoice/receipt books, and shopping bags are must haves. Make a bank run to get change - think about your price points and plan your change based on that. If you take credit card payments via square or any other device or app, make sure they are in working order and that you remember passwords for apps. Another thing we do is create a cheat sheet of all of out items pricing with tax. At the bottom we have every price point from $1-$100 with tax added for a quick reference guide.


In addition to the bare minimum of receipt books, etc. you want to make sure that anything you plan to use to package or wrap items you have on hand as well (tissue paper, twine, gift boxes). Thinking back to your booth layout, make sure that all of these items along with shopping bags are laid out in a way that will make it fast and efficient to wrap or package items. Make knitted scarves and plan to drop them in shopping bags? Easy peasy. Make ceramic dishes and need to wrap them individually and them box them up? Plan to make some space for that and keep all materials handy. Plastic Rubbermaid drawers under a table can make for a quick wrapping station. If you make jewelry, you will want to be sure to have small boxes or pouches to protect purchases. It is also a really good idea to have boxes handy during the holiday season if people ask for them. I know it is an extra expense, but it is also part of the handmade shopping experience to have items nicely packaged. Uline is a great resource for packaging supplies.

Most craft show vendors have adopted the Square and other credit card payment methods, but it is always good to be prepared to take payments the old fashioned way (card imprint and paper receipt). Just because you have a square and the phone app doesn't mean you are guaranteed good cell signals or wifi. We have totally been to places that were the dead zone for cell phones, and with 50+ vendors trying to tap into the free wifi, forget it...nothing was working. This is when that receipt book will be extra handy, make an imprint either rubbing the card with a pen under the carbon copies (anyone who has ever worked in retail knows the drill) or write it down. Be SURE to destroy the card numbers asap after you are able to run the payment, and black out the # on the guests receipt for safety too. This is also where cash will come in handy, if your are not sure you have enough, bring more-you can always redeposit it into the bank after the show. Even if all of your items are under $10, be prepared to make change for someone who pays with a $100 bill. You know that person (can you tell we used to work retail!?) the one who comes first thing in the morning straight from the bank with a crisp hundred and you have to make $92 in change and they wipe out all your $20's...? Be prepared for that person :)

Tuesday, July 29, 2014

How-To Prepare for a Craft Show Part 1.3: Create Signage

Our third installment of the blog post we guest wrote on Etsy Dallas about craft show setup.

From part one of the Etsy Dallas blog post:

Create Signage
On average, a customer ask the price of items only twice before they feel uncomfortable asking again. Put them at ease by creating signage or putting price tags on all of your items. Make sure signage is easy for them to spot and big enough to be read from a distance. Also, be sure you have business cards handy and in a place that is easy for shoppers to find.

You may think that not having prices opens the door to conversations with your shoppers, but what if you are too busy to speak to everyone (and we hope that you always are)! 

Photo via Erica Sirotich Illustration


Signage should contain the following:
  • Your shop name at the top and something calling out that it is your price list
  • A list of each type of item (or item category) and it's price
  • Any special show pricing or bundled pricing you may offer
  • Show shoppers whether you take credit cards and which ones (you can just put the logos on it)
If all of your items are OOAK and priced differently, consider putting price tags on all items in an easy to find spot. Keep in mind if your item has movable parts or is delicate, putting tags on the bottom may not be wise. You are better off putting them somewhere that may not be as attractive but can cut down on unnecessary handling and breakage.

Another tactic is to price sections of product. For instance all items on one table are $20, you can put up one sign that states that for each table. You may also want to add signage to differentiate your product, even if it is all the same price. Do you sell dog collars for $15 in all sizes? Maybe your signage needs to point out sizes to help shoppers locate the item they need.

Consider putting up an additional sign or two where appropriate to tell shoppers pertinent info about your product and what sets it apart. Is your yarn hand spun by you, or is the wool sourced from local farms? Does your jewelry re-purpose vintage pieces? Do you take custom orders? Is it eco-friendly? Tell people about it!

Need some inspiration? Check out our craft show display board on Pinterest for more!


Be sure to check out the rest of this series on the blog!

Tuesday, June 24, 2014

How-To Prepare for a Craft Show Part 1.2: Lay Out Your Booth Space and Displays

A continuation of the blog post we guest wrote on Etsy Dallas about craft show setup.

From part one of the Etsy Dallas blog post:

Lay Out Your Booth Space and Displays
About three weeks before the show, plan your booth space. Decide what your table layout will be, how your displays will be set up and where chairs and product storage will go but still be easily accessible. Tape off the booth space on the floor or driveway and be sure everything fits. Once you have a "floor plan," decide how your goods will be displayed.


It is important to do this because often you only have an hour or two to unload and set up for a show. Depending on your product unloading could take you 30 mins or more. Have to set up a tent? Add 10-15 min for that...tables? 5 more. That is 50 of your time right there, give or take 10 min based on the product you make. So it's imperative that you plan ahead on set up or you will either be unprepared or rushing right before the show starts.

What should you do in this dry run setup? Tape off on the floor or driveway (with painters tape) your exact booth space. Bonus points for setting up your tent in your driveway and working with that (and double checking that your tent is in order and you have all your parts and pieces).

Once you have your booth space marked off or tent set up you should consider the following:
  • How many tables will you need and what should their layout be-keep in mind you should leave room around the tables so you can enter and exit your booth space
  • Where and how will my displays be set up
  • Will my displays hold my product?
  • Can I see over and work around my displays?
  • Did I leave work space for myself to write receipts, wrap or package purchases, put my soda?
Try a couple different layouts. You may think you have laid out the best option, but try a few more anyways. You never know what you will come up with and it is a good exercise to do, just in case when you arrive at the show your booth space or location changes. It pays to be prepared with  a few options and be flexible.

Missed Part 1.1? Find it here:

How-To Prepare for a Craft Show Part 1.1: Make Enough Product


Sunday, June 15, 2014

Craft Party Photos!

We had a great time at the Etsy Dallas Craft Party and wanted to share some photos! Thanks to all who came out and to Etsy and Etsy Dallas for putting it together :)


Tuesday, June 10, 2014

How-To Prepare for a Craft Show Part 1.1: Make Enough Product


Last week I shared the link of part one on how to prep for a craft show that I wrote for Etsy Dallas. As promised, I wanted to delve in a little deeper into some of these topics for you to really create a comprehensive resource for newcomers. We were once new too, and have pictures of the hot mess we were at our first show to prove it! Thanks to other seasoned crafters we found our way and now can happily pay that advice forward.

From part one of the Etsy Dallas blog post:

Make Enough Product
First and foremost you need product – and plenty of it. You should aim to still have a relatively full display toward the end of the show. If your booth looks empty, you might get passed by. Depending on your price points, you should expect to sell 1/4 to 1/3 of the inventory you bring. The best way to be prepared is to make a production schedule and try to stick to it. Then bring everything to the show, even if you aren't sure you will sell it.

There are many formulas for how to arrive at how much to make and bring to a craft show and I will cover more of them here. Some things to keep in mind for this is what kind of product you sell, your price points, and how much it takes to fill your display table. Since a lot of these formulas are in terms of dollars you will need to convert that to units based on what you make. We make soap, and at an average retail of $4-$5 to make $100 I would need to sell at least 20 bars. But if you sell $50 necklaces, you only need to sell two to make that same $100 and most likely will not need to make nearly as much inventory in units to cover your sales.

The next thing to consider is how much it takes to fill your display table or booth. You want your display to still look full at the end of the show (between 75-80% full at least). If your booth looks too empty shoppers may pass you up thinking that you have sold out of everything and you can miss a lot of sales this way. For example, for our soap, it takes approx 200 bars of soap to fill our table, so if based on the formulas below I expect to sell 250 bars, I need to make about 450 in total. Never. Look. Empty.


Here are a few formulas that you can use to give you an idea of how much you should make. I will use the same soap (at $5, 200 for display) and necklace (at $50, 50 for display) for these examples.

Option 1: 7x-10x your booth fee
With 10x the booth fee being your high side target, and 7x what you will more realistically sell.
Booth Fee $100
10x$100=$1000 
for $5 soap that is 200 bars to sell + 200 bars for display=400 total
for $50 jewelry that is 20 to sell + 50 to display=70 total

7x$100=$700 
for $5 soap that is 140 bars to sell + 200 bars for display=340 total
for $50 jewelry that is 14 to sell + 50 to display=64 total


Option 2: % of attendance
If the show you are doing gives you an annual attendance rate (assuming they are an established show) you can use this number as a guideline to multiply by your average transaction. The lower the price point the higher the rate. For under $10 a 3% rate of purchases per attendees is good-that is 1 of every 100 people. For higher price points this rate may be 1% or less if your price point is really high.
Show attendance=2000
3%*2000=60 shoppers
1%*2000=20 shoppers
60 shoppers*avg soap purchase (3 bars or $12)=180 bars ($720) + 200 display=380 bars
20 shoppers*avg jewelry purchase $50=20 necklaces ($1000) + 50 display=70 necklaces


Option 3: 1/4-1/3 total inventory sales
As we stated before expect to sell between 14 (25%) and 1/3 (33%) of what you bring. This approach is kind of a backwards approach to what you will sell. We have found you sell between 25-33% of the merch you bring. Want to sell $1000? Then you need to bring at least $3000 in inventory ($1000/0.33) which is 600 bars of soap at 33% (200 for display + 400 to sell).


Keep in mind that the cheaper the booth fee the lower the attendance usually is. It costs time, money, and effort to bring people into a show, so if the fee is low and there isn't an estimated attendance expect a low number and base inventory off of that.

Also consider the type of audience that is being targeted for the event. Does the target audience for the show match up to your target customer in terms of the type of product you are selling and your price points? Are you selling fine art for $400 at a show targeted to college age audience? It may not go over well.

Always remember at the bare minimum you should sell enough to cover your booth fee + the time you would pay your self for the hours you worked at the show x 2.

A lot of this comes from experience so it is important to keep track of how much you brought and how much you sell, in dollars and units (and by item type) if possible. The more detailed information you have the better you can use that information to help you prepare next time! 


Thursday, June 5, 2014

Etsy Craft Party 2014: Recapture!


Who's ready for a partay! Join Etsy Dallas and other area crafters for an evening of fun, food and drinks. This years theme focus is on transforming photographs into display worthy works of art using a variety of craft supplies and techniques! This years Craft Party will be held at City Craft this Friday (6/6) at 7pm!

Take a look at some of the inspirational pieces our team members have already cooked up in preparation of the event! Bring you own photos (or copies of them) or you can choose from photos on paper or fabric that will be provided at the event.
Photos from Etsy Dallas

Tuesday, June 3, 2014

How To set up a Craft Show Booth Like a Pro

A few weeks ago we were asked by Etsy Dallas to guest write an article on how to set up for a craft show. My question back was "the day of? or all the actual work that goes into it?" Both! They said.

The resulting brainstorming session of me and my sister resulted in a two part series covering everything from the weeks leading up to the day of the event. We covered topics ranging from inventory forecasting to what's in our disaster kit.

There were several things I would have loved to delve into deeper, but I'm pretty sure they weren't going to change it to a 10 part series for me! :)
So over the next few days and weeks I will hit each subject in more detail so you can learn a little more of the behind the scenes buildup to a craft show.

But for now, head on over the the Etsy Dallas Blog to check out part one of How to set up a craft show booth like a pro!


Monday, May 19, 2014

How-To Tuesday Cheesy Broccoli Quinoa Bites

I have been a bit obsessed with quinoa lately. High in protein and fiber it leaves me feeling full for hours and has enough carbs to keep me going for after work runs. Tonight I made these cheese and broccoli quinoa patties that were pretty darn yummy-and they were really easy to make (because if it makes more than 3 dishes dirty to prepare...I'm out!). These were great on their own, but would also make a great side for grilled chicken or salmon!


Ingredients:
This made 15 2.5" patties, I like to make enough to have leftovers for lunch/dinner for a day or two, but you can cut it in half if needed.

1c Quinoa
2c Water
3c Broccoli Florets
1/2c Sharp Cheddar
2 Large Eggs
2 tsp Minced Garlic
1/2 tsp Italian Seasoning
1/2 tsp Onion Powder (you could also use 1 small onion, but I'm not an onion fan)
Salt and Pepper to taste
Olive Oil or Cooking Spray (I used an Olive Oil spray by Pam)

Add quinoa and water in a pot and bring to a boil, then cover and reduce to low for 15 min until cooked. Remove from pot an put in large mixing bowl to cool.

Cook broccoli until slightly tender. Dice up broccoli florets into small pieces and add to quinoa along with cheese, garlic, seasoning, salt and pepper. Mix well, then add eggs last to hold the mixture together.

Add/Spray pan with oil and bring to medium heat. Scoop up mixture and roll into balls-mine were a tiny bit bigger than a golf ball, and place into pan, pressing them down into patties.

Cook on each side for 7 min or until golden brown on each side.

Enjoy!


Tuesday, April 22, 2014

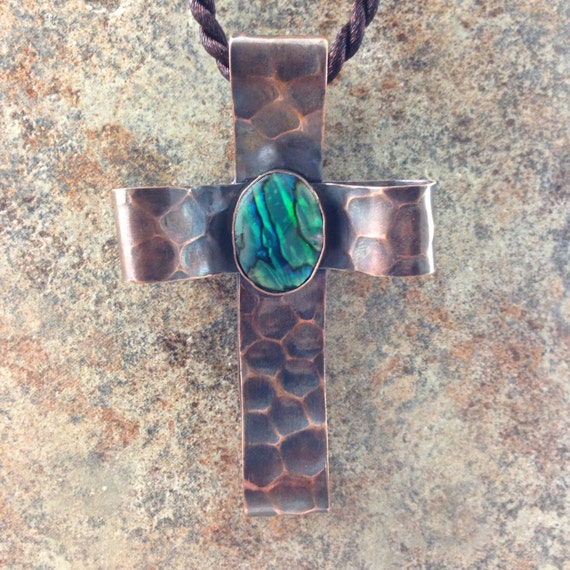
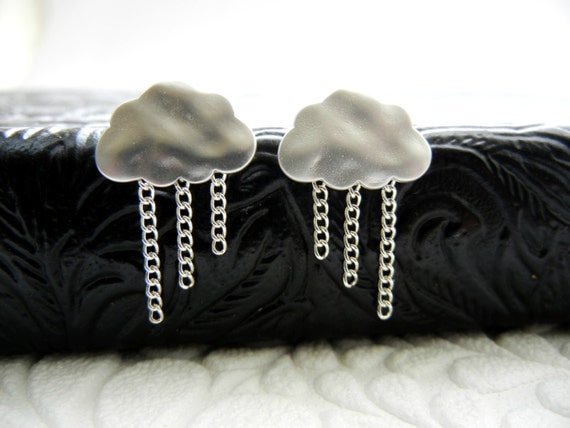
Find a Little Bling at the Bash


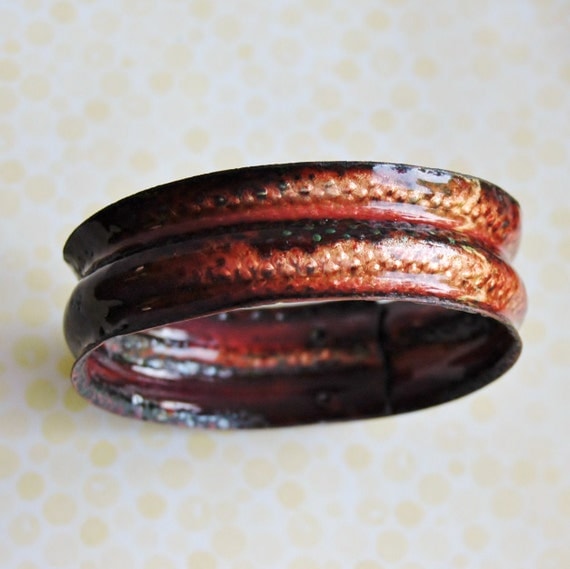
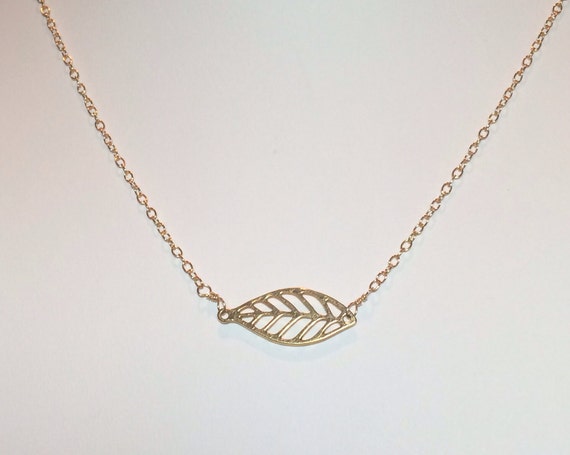
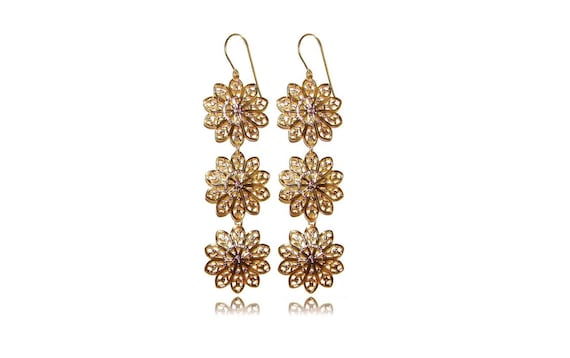
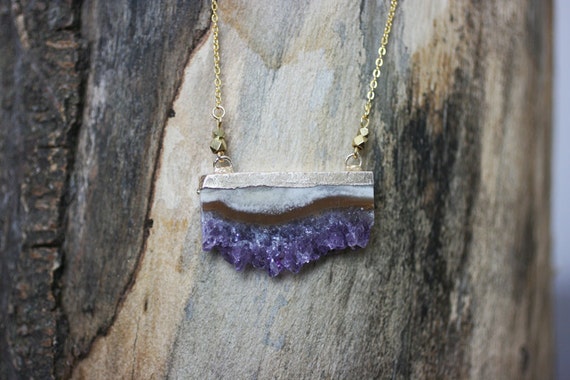
We have some wonderfully talented jewelry designers at this years Bash, it'll be hard to choose what to take home (at least for me). Here is a sneak peek-I love how all of these pieces have a very nice natural/earthy inspired feel to them-perfect timing for Earth Day.

Enameled Bangle by Creative Input by Liz


Gold Band by f. is for Frank


Gold Leaf pendant by Kathleen Care Jewelry


Snowflake earrings by Sarah Briggs


Agate OOAK ring by Treah Designs


Sliced amethyst necklace by Estie Made


Copper and Abalone cross by Jean Love Designs


Raincloud earrings by Release Me Creations

Spring Bash Countdown Cont'd

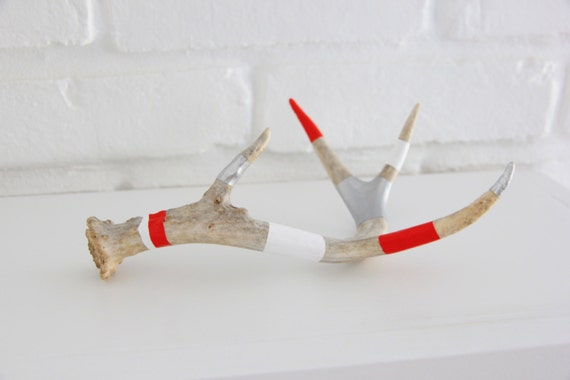
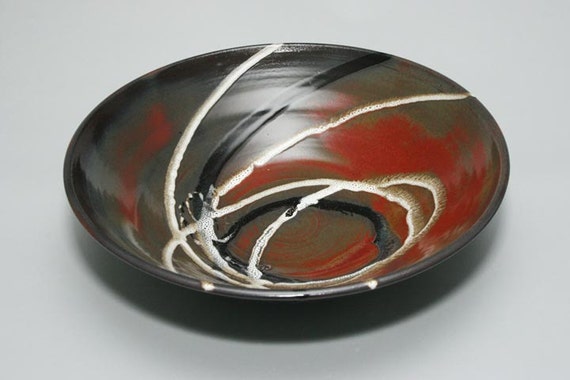
Need to spruce up your space? Look no further than the bash where you will find some awesome wares to freshen up your decor!

Our Green Nest mixes vintage and modern items with a splash of color. This painted antler is the perfect conversation piece for an end table or mantle.


The Letter Lounge gives new life to old books cutting them not only into letters but a variety of shapes and symbols. This particular book is mine, which I picked up at WRLM last year. I plan to add a science book to my collection this year :)


Blue Flame Studios makes a variety of teapots, mugs and serving pieces which are beautifully glazed to perfection. In addition to this dynamic statement serving bowl I love their black on black (matte/gloss) teapot.


Monday, April 21, 2014

Deck Your Walls

Today's post is all about our Spring Bash artists. This year we have no shortage of talented artists ranging from acrylic to mixed media. Brighten up your walls with some new art from the Bash!


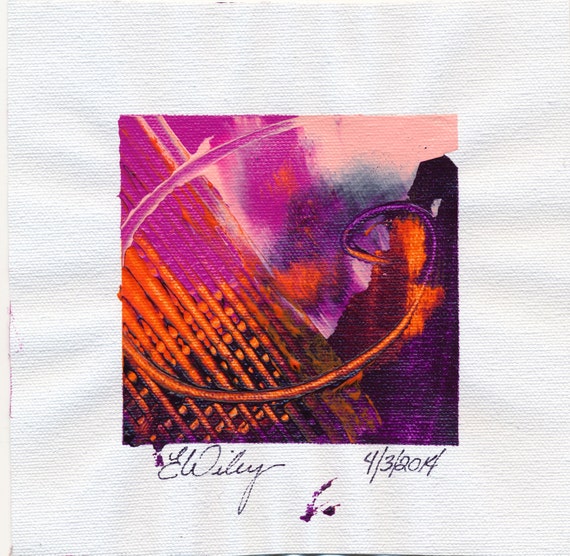
Liz Wiley has a lovely collection of abstract art, I especially love the moody colors of this piece, which is a part of a painting a day series that she has been working on since June 2013!


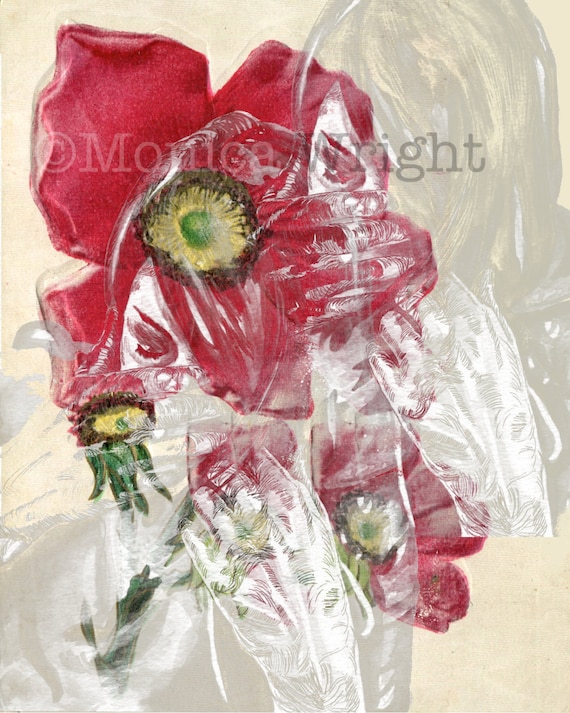
Monica Wright of Refill My Glass incorporates her own illustrations into vintage postcards like this beautiful piece.


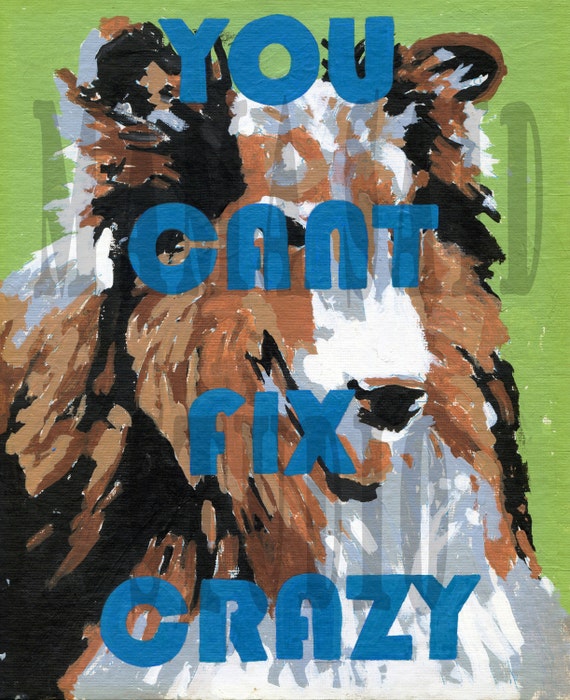
Vintage paint by numbers get an updated and witty twist at Mama Said Studio.


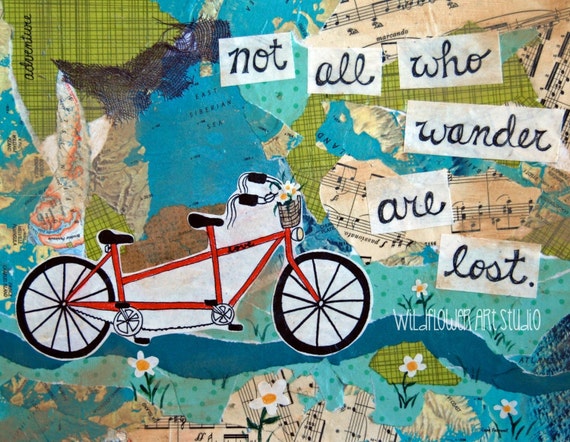
Emile Stewart of Wild Flower Art Studio creates whimsical collage images full of inspiration and wanderlust.


Anna Tovar creates nature inspired watercolors and giclees as well as calligraphy art.


Join us for the 6th Annual Etsy Dallas Spring Bash on April 26th at the Shops at Park Lane!


Saturday, April 19, 2014

T Minus 7 Days to the Spring Bash!

Where did the time go? The Bash is almost here and true to our PnP selves, we are crazy rushing to make as much product as possible for the event. Check out the Handmade Bash site for all the details including the awesome artists list. We have some awesomely talented people at the show this year (just like every year) and you won't want to miss it! In the days leading up to the Bash I'll start showing them off here, starting today with our artists whose focus is on the wee ones :)


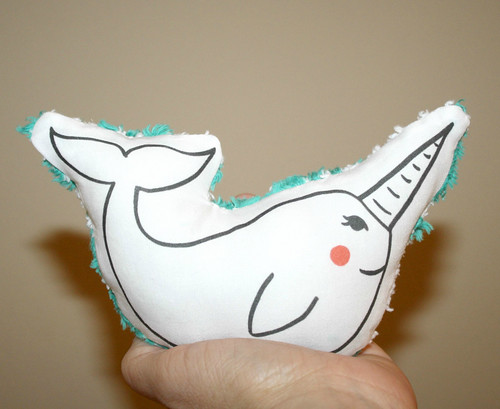
Regal Cottage makes classic toys with modern sensibilities

Regal Cottage-Narwhal Rattle


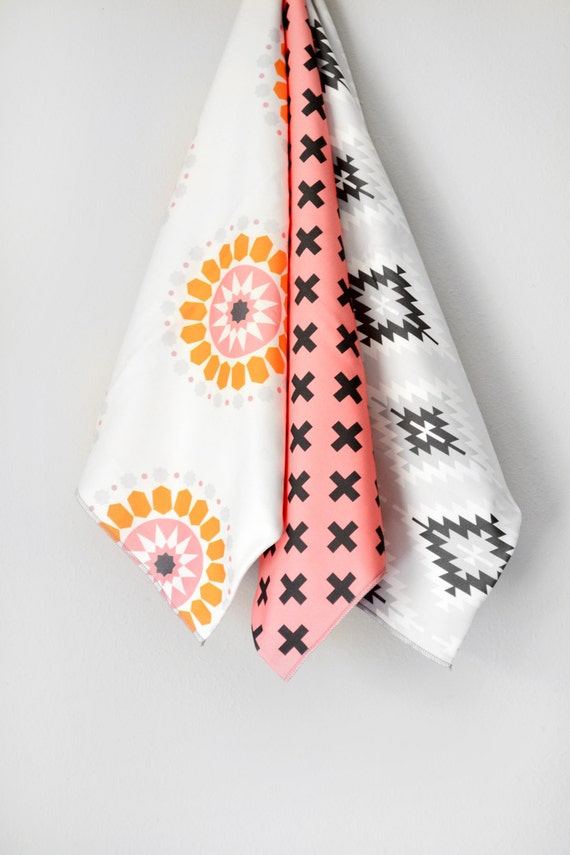
Wren and Rumor makes bedding, blankets and burp cloths in modern designs.


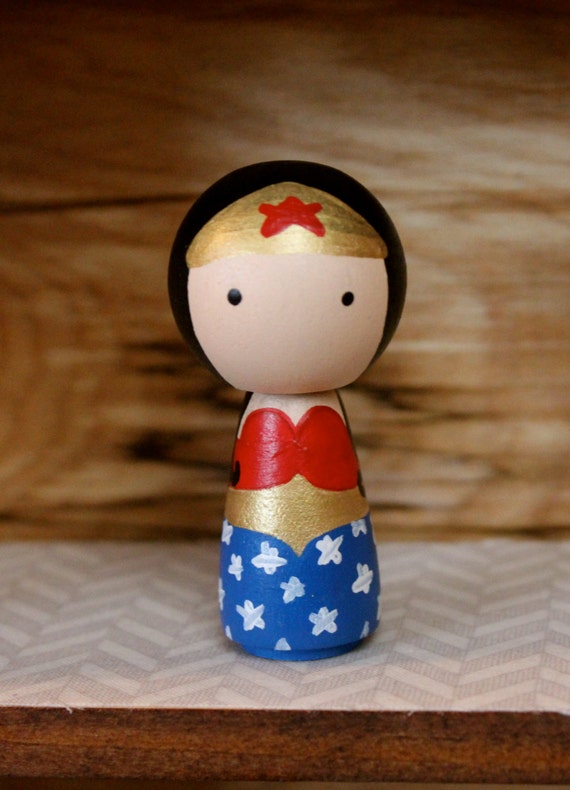
Wooden Leg Named Smith makes handmade and hand painted toys.


Bonjour Mae Mae specializes in accessories for girls and boys.

Tuesday, March 25, 2014

How-To Tuesday Stuffed Shells Recipe

In an effort to eat more like an adult and learn to make food I wouldn't be embarrassed to serve my friends I have been playing around in the kitchen. Generally I like to eat foods that are low in fat and carbs and high in protein, but am a really picky eater so it makes it hard to strike a balance. This dish definitely fits the bill packed with ground turkey and beans with just enough pasta to satisfy. It's pretty easy to make so that's a bonus too :)

First brown your meat. I like to use ground turkey or turkey Italian sausage. But ground beef or pork works well too. If you are not using sausage, add some seasoning for flavor-I used and Italian seasoning with basil, rosemary, garlic and thyme.


Next boil the pasta shells till they are "al dente", usually 8 min or so. Once they are cooked, transfer them to a bowl of ice cold water. It will keep them firm and make them easier to fill. Put them in the fridge while you do the next step.


With the pasta shells cooling in the fridge, finish preparing the filling. Combine the meat, veggies, ricotta, and pasta sauce in a large skillet and mix it while it is simmering. Preheat oven to 375 degrees.


 Remove the pasta shells from the fridge and start filling. Place the filled shells in a baking dish. Pour leftover pasta sauce over the shells and top with some shredded mozzarella and parm. Bake for 30 mins.


You will need:
1 box (12ozs) Jumbo Shells
1lb Italian sausage (casings removed) or ground meat of choice
1tbsp minced garlic
16oz Ricotta cheese (I like to use the reduced fat kind)
10oz package frozen spinach-thawed and squeezed dry
1c grated cheese (I used a 50/50 split of mozz and parm)
1 jar of pasta or marinara sauce-use half for the filling and half to pour over them to bake
Seasonings-either use a pre-made Italian seasoning, or use fresh chopped basil, rosemary and thyme


Thursday, March 20, 2014

Spring It On!

Finally! After a never ending, relentless winter, Spring is here! I am SO ready for it! To get you in a Springy state of mind, here are some great picks from our fellow Etsy Dallas members!

Print from DawnMPhotography


Fabric Banners from In Your Bones


Print by YLK Photography


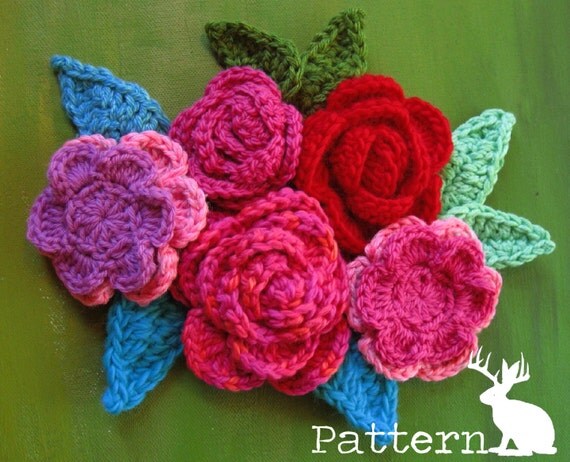
Crochet Flower Pattern by The Crooked Hook


Tuesday, March 18, 2014

DIY Dog Cookies

It should come to no surprise to anyone that both my sister and I are big time dog lovers. Like in a my dog is my furry child and no one messes with my baby sort of way. :)

Last year there was a huge ordeal of dog treats made in China that were making dogs sick. So after immediately tossing lots of treats, we started looking for good ole made in the USA treats. But they are a little harder to find than one would think. Green Pet in Bishop has several options, but the way my 100lb dog snaps them up I was going to go broke! So my sister decided (after much Pinterest searching) that we could make our own.

We have landed on two recipes that have our dogs drooling (pun intended). And even though it may not be too hard to impress a dog with food, I do have to say that both our pups really do prefer the homemade versions over the store bought. Like crack. Doggy crack-no joke.

So here is the recipe for Opie's favorite cookies:

They are super easy, with only 5 ingredients!


I didn't have any dog bone cookie cutters, but I did happen to have a squirrel one (not as random as you may think!), which I thought was still pretty fitting for a dog biscuit. He gobbles them up so quickly, I have since resorted to just cutting the dough up into 2x1 inch rectangles to speed up the process.


Cookie please! Look at that smile!


Here is what you will need to make them:
2 Eggs
1/2 c Canned Pumpkin
1/2 tsp Salt
2 tbs Powdered Milk
2 1/2 c flour (I used whole wheat flour)
water as needed

Preheat oven to 350 degrees.
Mix all ingredients together in a large mixing bowl. Add water as needed to make the dough workable, but make sure it is still pretty dry and stiff. I found that kneading it with your hands works best. Roll out the dough to approx 1/2" thick and use a cookie cutter to cut shapes (or just slice it up into rectangles if you don't care if they are cute). Bake for 20 min flip them over and bake for another 20 min.

Friday, March 14, 2014

Happy Pi Day!

Here are Pig and Peacock we admit that we are geeks. And that's why we are excited that it's π Day! Woo Hoo!

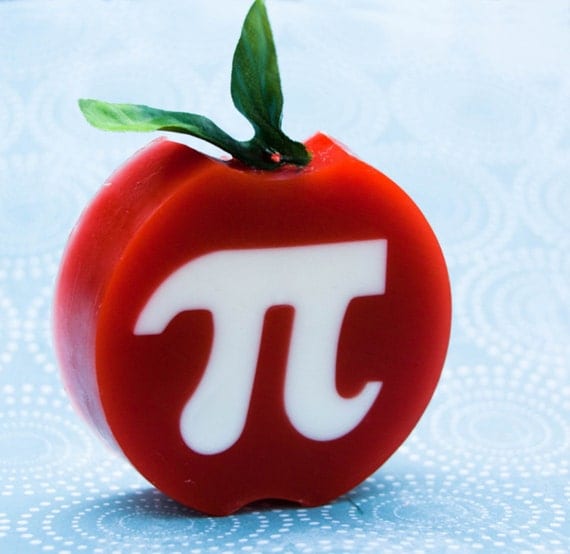
And what pray tell does one do to celebrate π day? Well we are having a π Day sale! Enter code PiDay at checkout for 10% off your entire purchase! Perhaps you could start  your π Day shopping with some π Soap!


Etsy is full of cool handmade π items, check out our treasury below to see more great items!


Know what the best way to celebrate π day is? Eat actual Pie-apple, key lime, lemon meringue (my personal fave), any pie will do!

Another great thing you could do on π Day is actually learn about Pi. Ya know, because learning is awesome.
Here are some fast facts:

  • π is the most recognized mathematical constant in the world. Scholars often consider π the most important and intriguing number in all of mathematics.
  • We can never truly measure the circumference or the area of a circle because we can never truly know the value of pi. π is an irrational number, meaning its digits go on forever in a seemingly random sequence.
  • If the circumference of the earth were calculated using π rounded to only the ninth decimal place, an error of no more than one quarter of an inch in 25,000 miles would result.
  • Computing π is a stress test for a computer—a kind of “digital cardiogram.